
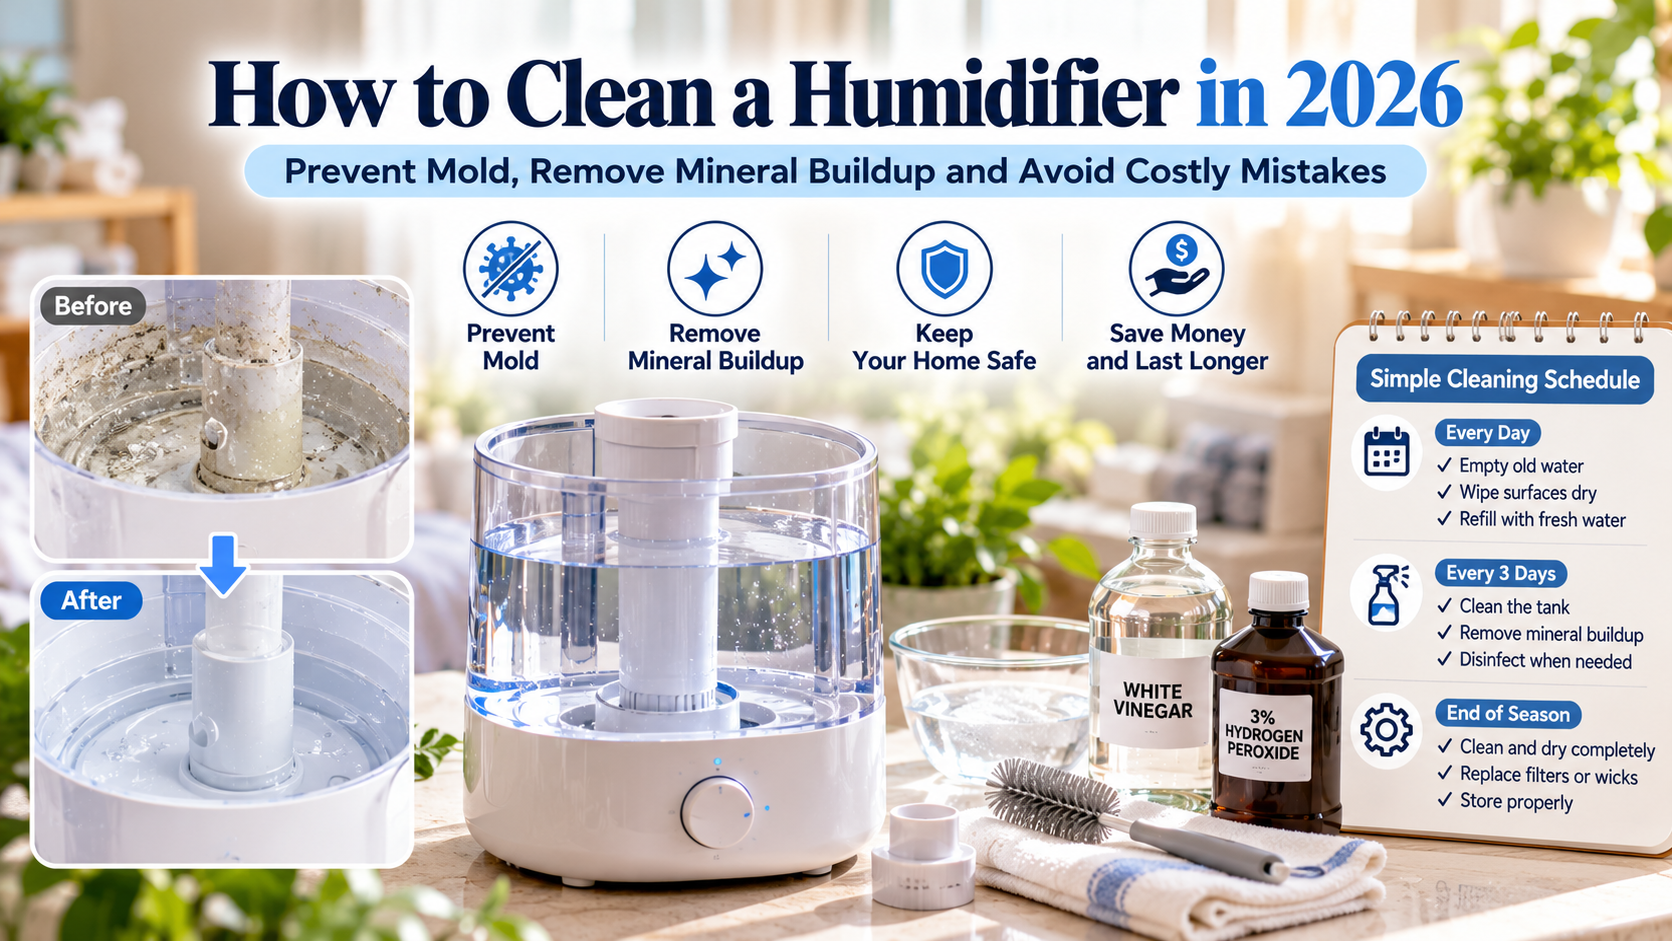
A humidifier can make a dry bedroom more comfortable, but it also creates a maintenance responsibility that is easy to underestimate.
Water remains inside a reservoir. Minerals accumulate on internal surfaces. Narrow channels and difficult-to-reach components can make thorough cleaning frustrating.
And if the unit is neglected, microorganisms may grow in the water and on damp surfaces.
The good news is that humidifier maintenance does not need to be complicated. The key is knowing what to do every day, what to clean every three days, which products are appropriate, and when a replacement part makes more sense than another cleaning attempt.
This guide explains how to maintain portable humidifiers, how to distinguish mineral scale from possible microbial contamination, and how to evaluate the true maintenance burden before buying your next machine.
Quick Answer: How Often Should You Clean a Humidifier?
The U.S. Environmental Protection Agency recommends emptying, drying, and refilling portable humidifier tanks daily and cleaning portable humidifiers every third day.
That is a more demanding schedule than many households expect.
| Task | Practical schedule | Why it matters |
|---|---|---|
| Empty old water | Every day | Reduces stagnant water |
| Wipe accessible wet surfaces dry | Every day | Limits persistent moisture |
| Refill with fresh, appropriate water | Every day | Avoids repeatedly topping off old water |
| Clean the tank and water-contact surfaces | Every third day | Removes scale, film, and accumulated deposits |
| Inspect wicks and cartridges | During routine cleaning | Identifies buildup, damage, or replacement needs |
| Check room humidity | During use | Helps prevent excess moisture |
| Clean and dry before storage | End of season | Avoids storing a damp appliance |
Important: These are general maintenance guidelines. Your manufacturer’s instructions take priority for disassembly, compatible cleaning products, filter handling, and replacement intervals.
1. Why Humidifier Cleaning Matters
Portable humidifiers repeatedly expose their internal surfaces to water.
That makes them vulnerable to two different problems.
Mineral buildup
Tap water often contains dissolved calcium, magnesium, and other substances.
As water evaporates or is dispersed, minerals may accumulate on the tank, heating element, ultrasonic membrane, or evaporative wick.
These deposits can appear as white, chalky, or crusty residue.
Microbial growth
Bacteria and fungi can grow in wet environments, particularly when water sits for extended periods and surfaces are not cleaned.
The EPA warns that ultrasonic and impeller humidifiers can disperse materials from their tanks into indoor air, including microorganisms and minerals.
These problems should not be confused.
Mineral scale is not automatically mold, and removing mineral scale is not the same as disinfecting a contaminated appliance.
A well-maintained humidifier requires attention to both.
2. The Daily Routine: Empty, Dry, Refill
The most effective maintenance habit is also one of the simplest.
Step 1: Turn off and unplug the humidifier
Never clean or disassemble a powered appliance.
Allow warm-mist units to cool completely before handling the tank or heating components.
Step 2: Empty the remaining water
Do not repeatedly add fresh water on top of old water.
Discard the water remaining in the tank and accessible reservoir.
Step 3: Wipe accessible surfaces dry
Use a clean, soft cloth where appropriate.
Avoid forcing cloths or tools into delicate mechanisms.
Step 4: Refill with fresh water
Use the type of water recommended by the manufacturer.
For ultrasonic humidifiers, low-mineral water is particularly relevant because these devices can release minerals into the air.
For more detail, read our guide to distilled vs tap vs filtered vs RO water for humidifiers.
Step 5: Check the surrounding area
Look for moisture on nearby furniture, windows, walls, and flooring.
A humidifier should not leave nearby surfaces persistently wet.
If condensation appears, reduce output, move the unit, or stop operation until the moisture problem is resolved.
Daily maintenance is about preventing stagnant water, not merely making the tank look clean.
3. How to Deep-Clean a Humidifier Every Three Days
A deeper cleaning removes deposits and films that ordinary refilling will not address.
Use the following procedure as a general framework, while following your model’s instructions.
Step 1: Disconnect the unit
Switch it off, unplug it, and allow any heated components to cool.
Step 2: Remove the tank and approved removable parts
Take apart only the components the manufacturer identifies as user-removable.
Do not immerse the electrical base or expose electronic controls to water.
Step 3: Empty the reservoir
Discard remaining water and inspect the interior for scale, slime, discoloration, or unusual odors.
Step 4: Gently scrub accessible surfaces
Use a soft brush or nonabrasive cleaning tool.
Pay attention to corners, the reservoir, and areas where deposits collect.
Avoid scratching ultrasonic membranes, seals, sensors, or heating elements.
Step 5: Remove mineral deposits using an approved descaling method
If your manufacturer allows diluted white vinegar or another descaling product, follow its specified concentration and contact time.
Consumer Reports describes vinegar-based cleaning methods for suitable humidifier components.
However, not every material or device is compatible with vinegar.
Do not assume that a method recommended for one humidifier is appropriate for another.
Step 6: Follow the manufacturer’s disinfection instructions when applicable
Descaling and disinfection are separate procedures.
The EPA advises following manufacturer recommendations for cleaning and disinfecting products. When specific recommendations are absent, its guidance discusses using a 3% hydrogen peroxide solution on water-contact surfaces.
Do not improvise chemical concentrations or combine products.
If the appliance has visible suspected mold, persistent contamination, or inaccessible dirty components, consult the manufacturer’s guidance before attempting further treatment.
Step 7: Rinse thoroughly
After using any approved cleaning or disinfecting product, rinse all water-contact surfaces thoroughly according to the instructions.
Residual chemicals should not be dispersed into indoor air during operation.
Step 8: Dry and reassemble
Allow parts to dry as directed, reinstall them correctly, and check that seals and components are properly seated.
Refill only when the humidifier is ready for use.
4. Vinegar vs Hydrogen Peroxide vs Bleach: What Is the Difference?
These products are frequently discussed in humidifier cleaning guides, but they do not perform identical jobs.
| Product | Typical role | Main caution |
|---|---|---|
| White vinegar | Removing certain mineral deposits | Not compatible with every component; not a universal disinfectant |
| 3% hydrogen peroxide | Disinfection when appropriate under EPA/manufacturer guidance | Requires correct handling and thorough rinsing |
| Bleach-based products | Disinfection only when explicitly appropriate | Can damage some materials; mixing with other cleaners is dangerous |
| Plain water and soft brush | Routine removal of loose deposits | May not remove persistent scale or contamination |
The most important chemical safety rule
Never mix bleach with vinegar, ammonia, or other cleaning products.
Dangerous gases can form.
Do not mix vinegar and hydrogen peroxide in the same container either. Follow a single manufacturer-approved cleaning process, rinse thoroughly, and avoid chemical experimentation.
A stronger chemical solution is not automatically a better solution for a small household appliance.
5. How to Tell Mineral Scale From Possible Mold
Many humidifier owners discover residue and immediately assume the appliance is contaminated with mold.
Appearance alone is not enough to make that determination.
White or chalky deposits
These are often consistent with mineral scale, especially in homes with hard water.
They may accumulate around water-contact surfaces or heating components.
Slimy films
A slippery or slimy layer may indicate biological buildup and warrants prompt cleaning.
Dark spots or persistent musty odors
These may be warning signs of contamination, but color and smell cannot reliably identify a specific organism.
What should you do?
Stop using the humidifier if you notice suspicious growth, persistent odors, or contamination that cannot be removed safely.
Inspect removable parts and consult the manufacturer’s cleaning and replacement instructions.
If contamination remains in inaccessible components or repeatedly returns, replacing the affected part—or the appliance—may be the more sensible option.
Do not continue operating a visibly contaminated humidifier while hoping the mist will somehow clean itself.
6. Ultrasonic vs Evaporative vs Warm-Mist: Different Cleaning Problems
Not every humidifier requires the same maintenance approach.
Ultrasonic humidifiers
Ultrasonic models use a vibrating component to create fine droplets.
Common maintenance concerns include:
- Mineral buildup on the vibrating membrane
- White dust from mineral-rich water
- Residue in the tank and water basin
- Narrow openings that are difficult to clean
Avoid scraping delicate ultrasonic components.
Evaporative humidifiers
Evaporative models use a wet wick and fan.
Common concerns include:
- Mineral accumulation in the wick
- Reduced airflow through clogged material
- Water remaining in the reservoir
- Replacement wick availability and cost
Some wicks are disposable rather than washable. Follow the manufacturer’s instructions instead of attempting to restore every used filter.
Warm-mist humidifiers
Warm-mist units heat water to produce steam.
Common concerns include:
- Scale on heating components
- Residue in the water chamber
- Burns from hot water or surfaces
Always allow these devices to cool before cleaning.
For a detailed comparison of ownership trade-offs, see our ultrasonic vs evaporative humidifier guide.
7. When Should You Replace a Humidifier Wick or Filter?
Replacement intervals vary by manufacturer, model, water quality, and operating conditions.
There is no universal rule that every evaporative wick should be replaced after the same number of weeks.
Check for the following signs:
- Reduced moisture output despite normal settings
- Heavy mineral deposits
- Persistent odors
- Discoloration or damage that cannot be addressed according to the manufacturer’s instructions
- A manufacturer-specified replacement interval that has been reached
A dirty or damaged wick may not be worth attempting to salvage.
Why replacement cost matters
Consumer Reports notes that replacement wicks can cost approximately $10–$25 depending on the model.
That may sound modest, but the seasonal cost depends on how often replacement is necessary.
Consider these illustrative scenarios:
| Replacement pattern | Wick price | Seasonal wick expense |
|---|---|---|
| Two replacements | $15 each | $30 |
| Three replacements | $20 each | $60 |
| Four replacements | $25 each | $100 |
These are hypothetical calculations, not verified replacement schedules for particular models.
Before buying an evaporative humidifier, check the actual part number, current price, availability, and manufacturer’s replacement guidance.
8. The Hidden Cost of a Hard-to-Clean Humidifier
The purchase price is only one part of the ownership experience.
Imagine two hypothetical humidifiers.
Model A costs $55 but has a narrow tank opening, several awkward crevices, and a disposable component that is difficult to find.
Model B costs $90 but has a wide opening, removable washable components, and readily available replacement parts.
The cheaper model is not automatically the better value.
Consider three categories of cost.
Direct maintenance expense
This includes replacement wicks, cartridges, approved cleaning supplies, and other consumables.
Water expense
An ultrasonic humidifier may be more convenient with purchased distilled water, while an evaporative model may permit ordinary tap water.
The difference can be substantial over a heating season.
Maintenance time
Suppose one design takes an additional five minutes to clean every three days.
Over a 120-day season:
120 ÷ 3 × 5 minutes = 200 extra minutes
That is more than three hours of additional cleaning time in one season.
This example is illustrative; actual cleaning times vary.
A humidifier that is easier to maintain may be worth a higher initial price even if its technical performance is similar.
9. Seven Features to Check Before Buying a Humidifier
If you are shopping for a new humidifier, evaluate its cleaning design before being distracted by decorative lighting, app controls, or advertised runtime.
1. Wide tank opening
Can you reach the interior with a cleaning cloth?
2. Accessible water reservoir
Are the areas that hold water easy to inspect and clean?
3. Removable components
Can approved parts be removed without tools or excessive force?
4. Clear cleaning instructions
Does the manual identify appropriate cleaning products and methods?
5. Replacement part availability
Can you readily purchase the exact wick, cartridge, or other consumable?
6. Humidity controls
Does the machine provide a humidistat, or will you need a separate hygrometer?
7. Realistic maintenance expectations
Does the manufacturer clearly explain how often routine cleaning and replacement are required?
A machine with fewer features but better access to its water-contact surfaces may offer a more pleasant long-term ownership experience.
10. Preventing Mold Around the Humidifier
Cleaning the appliance is only half the job.
Too much humidity can create damp conditions elsewhere in the room.
The EPA advises against humidifying indoor air above 50% relative humidity.
Use a hygrometer to monitor conditions rather than relying on how the air feels.
Watch for:
- Condensation on windows
- Damp curtains or nearby furniture
- Moisture on walls
- Wet carpeting around the appliance
- Persistent musty smells
If these problems appear, reduce humidifier output and address the moisture source.
Do not place a humidifier where mist directly wets absorbent materials.
The goal is comfortable indoor humidity—not maximum visible mist.
11. A Simple 120-Day Humidifier Maintenance Plan
A consistent routine is easier to follow than waiting for visible buildup.
Every day
Empty the old water, dry accessible surfaces, refill with fresh appropriate water, and check nearby surfaces for dampness.
Every third day
Perform the manufacturer’s recommended cleaning procedure. Inspect the tank, reservoir, and other accessible water-contact surfaces.
During routine cleaning
Check wicks, cartridges, seals, and removable components for wear or deposits.
When performance changes
Investigate reduced output, unusual noises, persistent odors, or visible contamination before continuing normal operation.
At the end of the season
Clean the appliance thoroughly, allow it to dry completely, and store it according to the manufacturer’s instructions.
Replace any consumables that should not be stored for reuse.
This schedule is intended as a practical framework, not a substitute for the manual supplied with your specific device.
12. Common Humidifier Cleaning Mistakes
Mistake 1: Topping off old water.
Adding fresh water does not remove the residue or microorganisms already present in the reservoir.
Mistake 2: Cleaning only when a smell develops.
Routine maintenance should happen before visible or noticeable contamination.
Mistake 3: Assuming distilled water eliminates cleaning.
Low-mineral water reduces certain deposits but does not prevent all microbial growth.
Mistake 4: Scrubbing delicate components aggressively.
Harsh tools may damage ultrasonic membranes, coatings, and seals.
Mistake 5: Mixing household chemicals.
Incompatible cleaners can release hazardous gases or damage the appliance.
Mistake 6: Reusing a disposable wick indefinitely.
A worn or heavily contaminated consumable may need replacement.
Mistake 7: Ignoring condensation around the appliance.
Excessive indoor humidity can create problems even when the humidifier itself is clean.
Frequently Asked Questions
How often should I clean my humidifier?
The EPA recommends cleaning portable humidifiers every third day and emptying, drying, and refilling their tanks daily. Follow the manufacturer’s instructions for your particular model.
Can I clean a humidifier with vinegar?
Vinegar can help remove certain mineral deposits, and Consumer Reports describes vinegar-based cleaning methods. However, you should first confirm that the manufacturer allows it for your device and its materials.
Does vinegar kill all mold in a humidifier?
Do not rely on vinegar as a universal disinfectant or assume that visible mold has been safely eliminated. Follow the manufacturer’s recommended cleaning and disinfection procedure.
Can I use bleach in a humidifier tank?
Only use a bleach-based cleaning procedure if it is explicitly appropriate under the manufacturer’s instructions. Never mix bleach with vinegar or other cleaners, and rinse thoroughly as directed.
Why does my humidifier smell bad?
Persistent odors may indicate stagnant water, microbial buildup, or contamination in a component that needs cleaning or replacement. Stop using the device until the source is addressed.
Why is there white buildup inside my humidifier?
White, chalky residue is often mineral scale from dissolved substances in water. Hard water can increase scale formation.
Can I wash and reuse an evaporative humidifier wick?
Some components are washable, while others are disposable. Follow the instructions for the exact wick and humidifier model.
Does distilled water prevent mold?
No. Distilled water generally contains fewer dissolved minerals, but it is not a substitute for daily water changes and routine cleaning.
Should I replace a humidifier that keeps growing mold?
If contamination persists, returns repeatedly, or remains in inaccessible components despite appropriate cleaning, replacing the affected component or appliance may be prudent.
Is an expensive humidifier easier to clean?
Not necessarily. Evaluate tank access, removable components, cleaning instructions, and replacement part availability rather than using price alone as a measure of convenience.
Final Verdict: The Best Humidifier Is One You Can Maintain Consistently
A humidifier should make your home more comfortable without creating an unreasonable cleaning burden.
The most useful habits are straightforward: replace standing water daily, clean the unit every third day, use manufacturer-approved cleaning methods, and keep indoor humidity under control.
For long-term value, consider more than the initial purchase price.
A wide tank opening, accessible water-contact surfaces, readily available replacement parts, and clear maintenance instructions may be more valuable than an impressive list of smart features.
If you are choosing between models, ask one final question:
Will this humidifier still be convenient to clean after the novelty of owning it has worn off?
That answer may matter more than any feature on the product box.
Sources and Editorial Notes
This article is based on publicly available guidance and independent consumer research. Living Pick Lab did not conduct original laboratory testing for this guide. All cost and time examples are illustrative.
- U.S. Environmental Protection Agency — Use and Care of Home Humidifiers
- Consumer Reports — How to Clean Your Humidifier
- Centers for Disease Control and Prevention — Preventing Waterborne Germs at Home
- Consumer Reports — Humidifier Buying Guide
Editorial disclosure: This guide provides general appliance maintenance information. It does not replace product-specific instructions or professional advice about indoor environmental contamination.